

You don't need to be a developer to give Claude write access to your Figma files. You do need about 20 minutes and a willingness to paste three lines into a terminal — once. After that, it's all conversation.
I'll be honest with you: when I first looked into this, I thought it was a developer thing. MCP servers. Node.js. Terminal commands. Tokens that start with figd_. The whole setup had the energy of something that would make a front-end engineer's morning and ruin mine.
Then I actually read the docs, ran the commands, and watched a notification toast appear in my Figma file while I sat at a café. That was the moment the bar moved.
This guide is the one I wish existed when I started. Written for designers who live in Figma, who maybe use Claude already, and want the strongest possible version of this workflow — not the watered-down, read-only, "good enough for now" version. We're going straight to the good part.
First: two different Figma MCPs
Most guides blur this. Don't let them.
Figma's official MCP (mcp.figma.com) is Figma's own product. Read-only. You paste a Figma frame link into Claude, and Claude can read the layout, properties, and component structure. Excellent for generating code from your designs. Built primarily for developers.
Figma Console MCP is an open-source project. It's bidirectional — Claude can read and write to your Figma files. Create frames, manage design tokens, build component sets, run design system audits. It has 58 tools in its full local mode. This is what makes "Claude, create a card with our brand colors" actually work in Figma, live, while you watch.
This guide sets up both. The official one augments the other — together they cover creation, inspection, and code generation in one setup.
What "Local Mode" means and why it's the one you want
Figma Console MCP has a Cloud Mode — a remote server you can connect to without installing anything locally. It's useful for getting started quickly, but it tops out at fewer tools and loses real-time monitoring (console logs, selection tracking, document change events).
Local Mode runs the MCP server on your machine via NPX. It unlocks all 58 tools, real-time monitoring, and full bidirectional access. It's also what every serious use case — managing token libraries, running the Design System Dashboard, building component sets — actually runs on.
This guide sets up Local Mode. The terminal steps are minimal. You do them once.
Prerequisites
- macOS (Windows guide coming soon)
- Claude Code — claude.ai/code, requires a paid Claude plan
- Node.js — nodejs.org, download and install the LTS version
- Figma Desktop — installed and running (the Desktop Bridge plugin requires it)
- A Figma personal access token (we'll create this in Step 1)
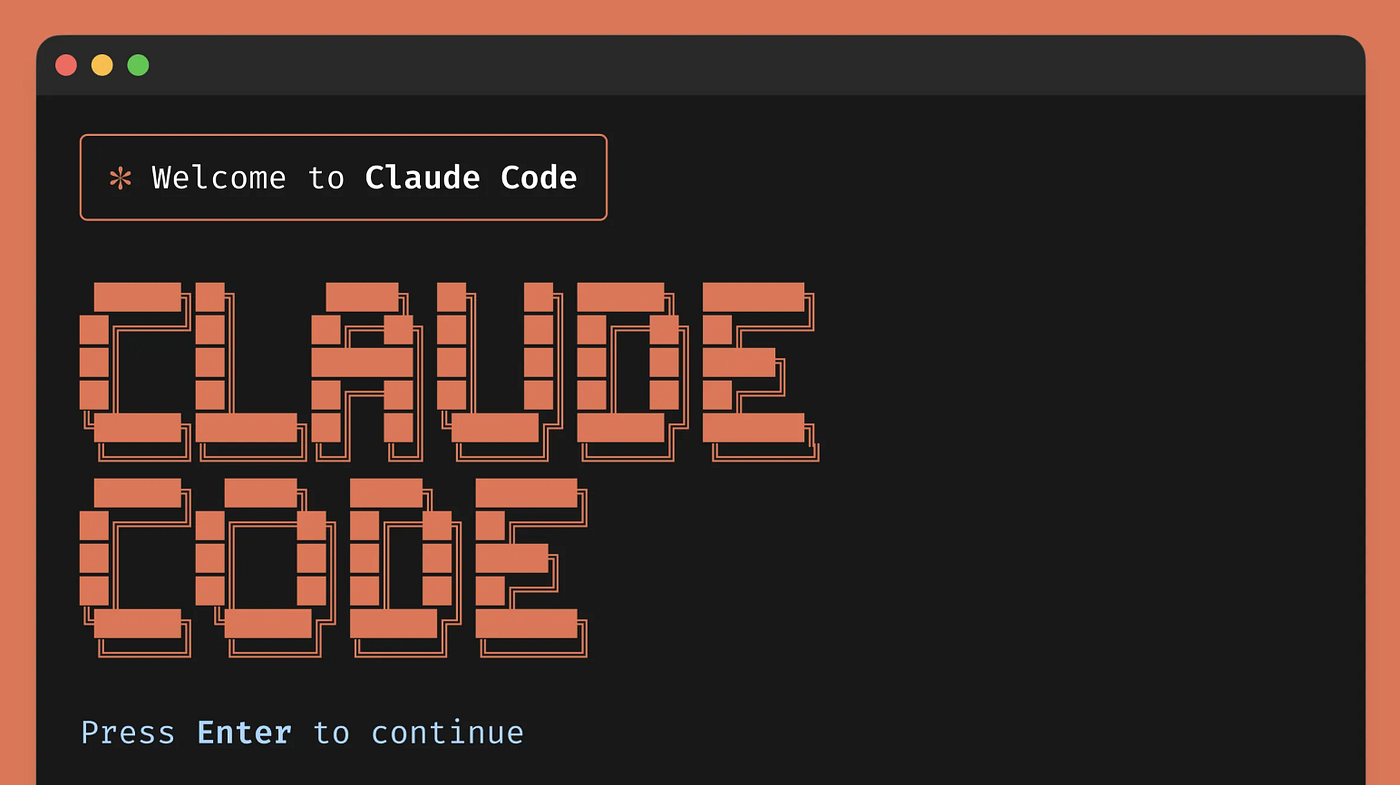
Claude Code launched in Terminal. This is the interface you'll use to talk to your Figma files.
Step 1 — Generate your Figma personal access token
In Figma Desktop: Menu → Account Settings → Security → Personal access tokens → Generate new token.
Name it Claude MCP. Set expiration to 90 days or leave it open-ended. Before generating, assign the scopes in the table below — you won't be able to edit them after creation.
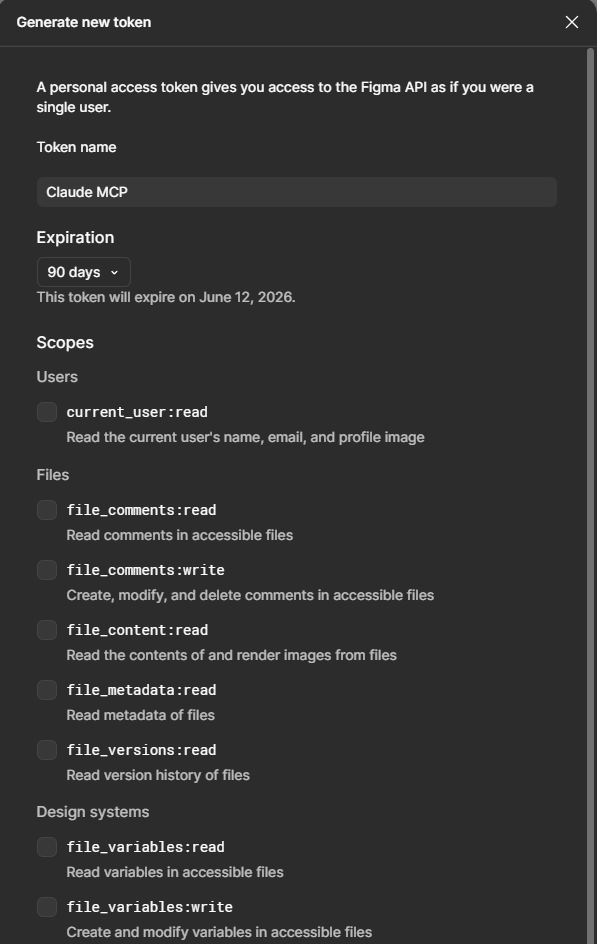
The scope selection screen during PAT creation. Check all required scopes before generating — you can't edit them later.
Required scopes for all plans:
| Scope | Why you need it |
|---|---|
file_content:read | Read file structure, nodes, layers, and design properties |
file_metadata:read | Read file names, thumbnails, and last-modified info |
current_user:read | Identify your account (required for authentication) |
library_assets:read | Read individual published components and styles |
library_content:read | Read published component libraries in files |
team_library_content:read | Read published components and styles across teams |
file_comments:read | Read comments on files |
file_comments:write | Post comments (used by the Comments API tools) |
file_dev_resources:read | Read dev resources and code links attached to components |
file_dev_resources:write | Update dev resources (for design-to-code parity workflows) |
projects:read | List projects and navigate file structure |
Enterprise-only scopes — skip if you're on Free, Pro, or Organization:
| Scope | Why you need it |
|---|---|
file_variables:read | Read variables via the REST API |
file_variables:write | Write variables via the REST API |
Not on Enterprise? Variable management still works through the Desktop Bridge plugin — it uses the Figma Plugin API, not the REST API. You get full variable creation without these extra scopes.
Copy the token immediately after generating. It starts with figd_ and Figma will never show it again.
Step 2 — Install the Official Figma MCP in Claude Code
Open your terminal and run Claude Code (claude). Then add Figma's official MCP:
claude mcp add --transport http figma-remote-mcp https://mcp.figma.com/mcpRestart Claude Code. Type /mcp to check the connection status, then authenticate through the Figma OAuth prompt when it appears.
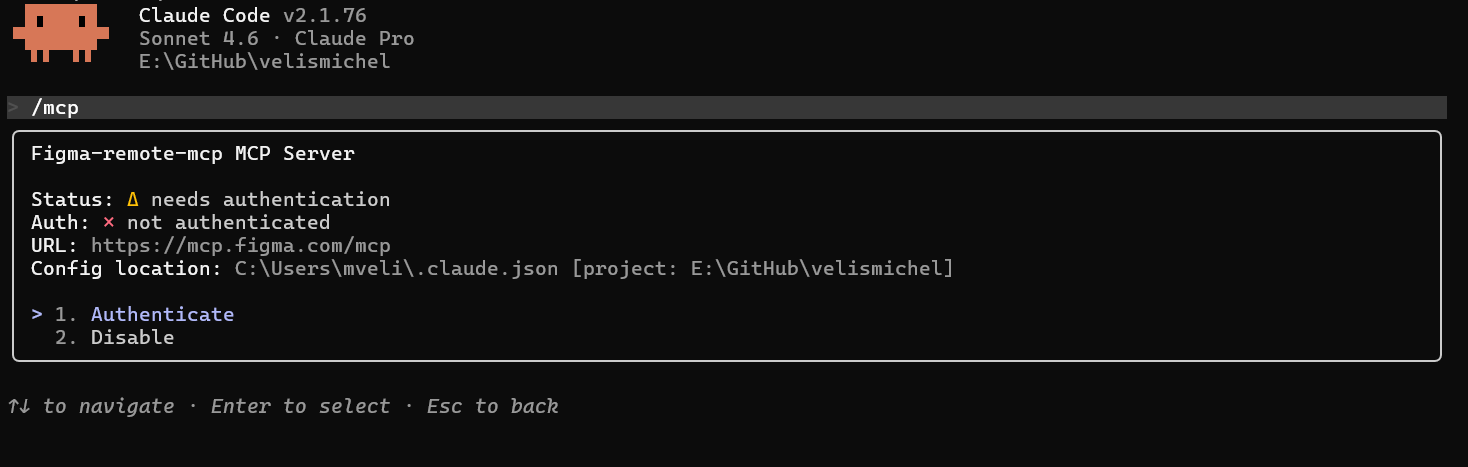
After adding the MCP, Claude Code will prompt you to authenticate with Figma via OAuth.
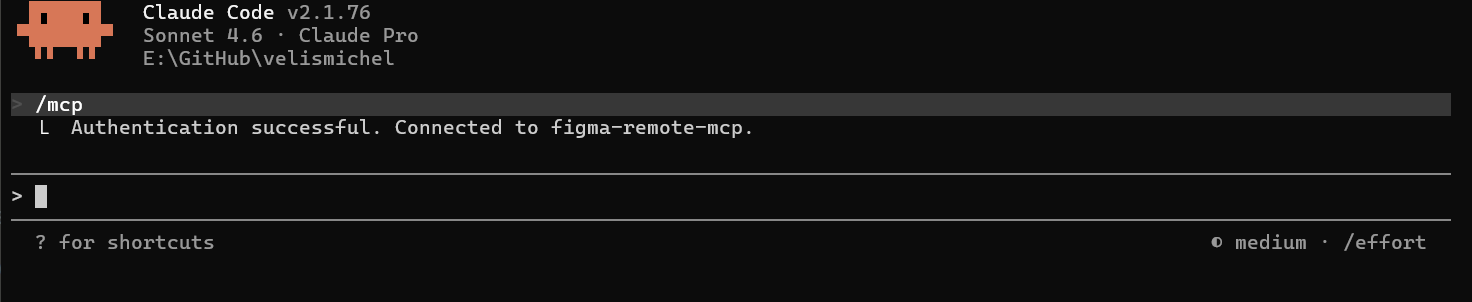
Authentication confirmed. You'll see a success state before being returned to the terminal.
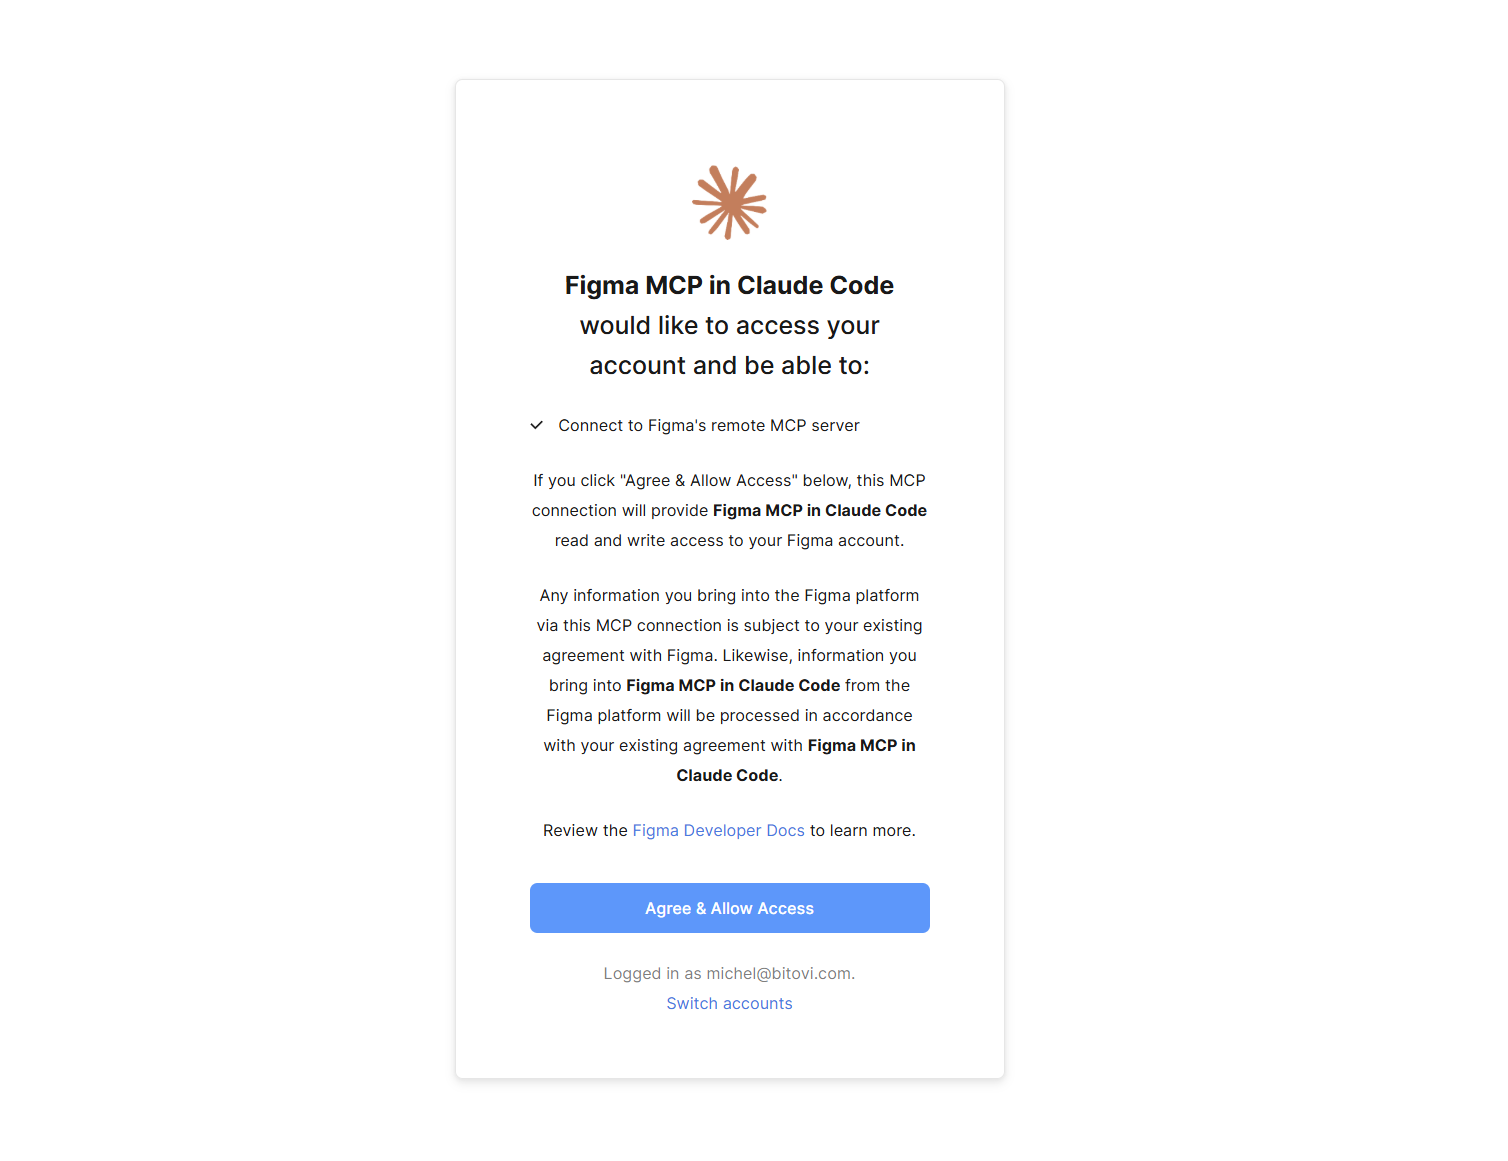
Figma will ask you to explicitly allow Claude access. Click Allow.
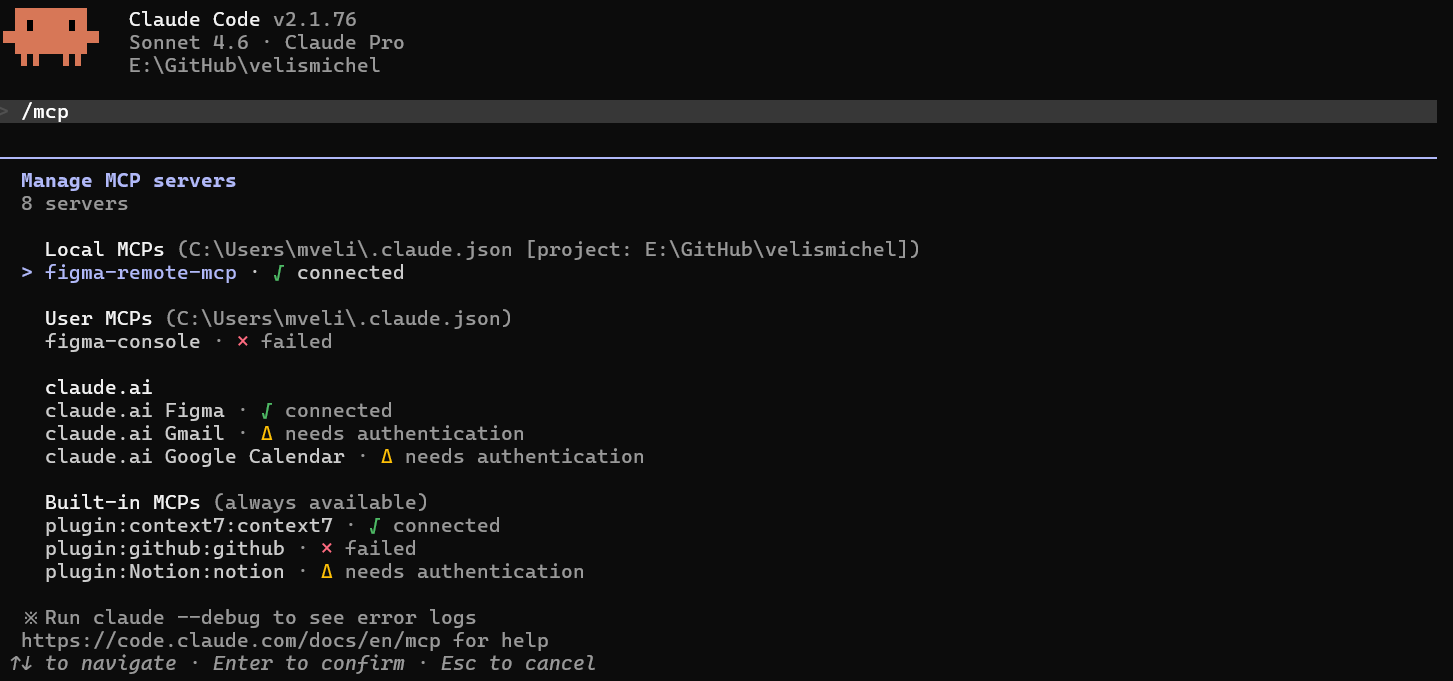
Connected. The official Figma MCP is now active in Claude Code.
Step 3 — Install Figma Console MCP via NPX
In your terminal (outside Claude Code, just a plain zsh or bash session):
claude mcp add figma-console -s user \
  -e FIGMA_ACCESS_TOKEN=figd_YOUR_TOKEN_HERE \
  -e ENABLE_MCP_APPS=true \
  -- npx -y figma-console-mcp@latest
Replace figd_YOUR_TOKEN_HERE with the token from Step 1. The -s user flag makes this available across all your Claude Code sessions, not just the current project.
Restart Claude Code again. Run /mcp and you should now see both figma-remote-mcp and figma-console listed.
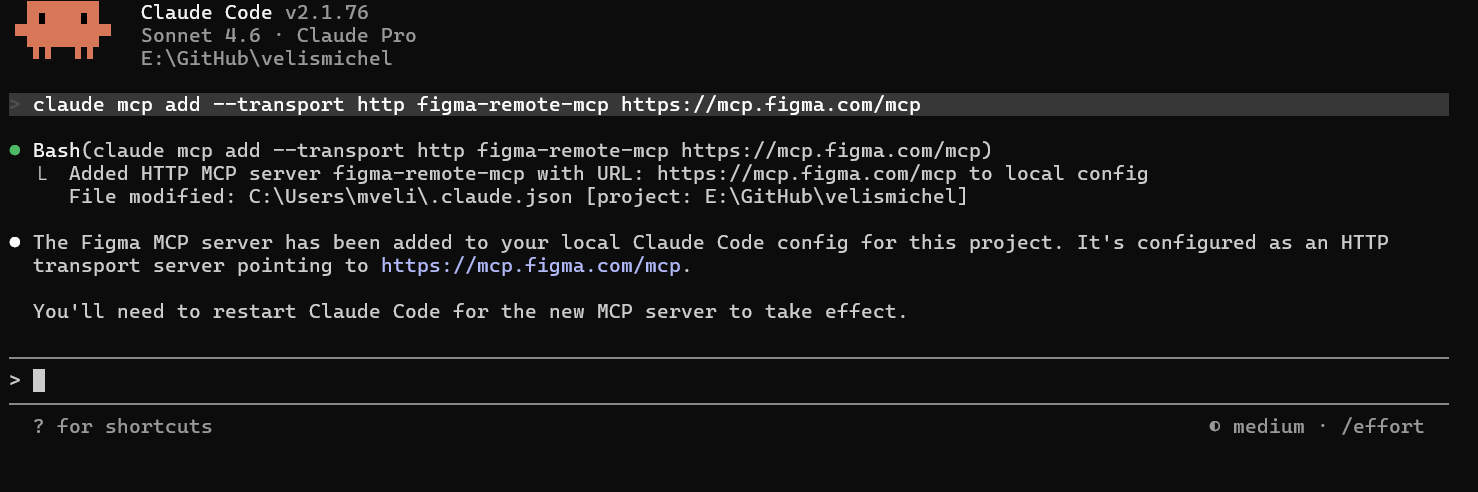
Running the install command in Terminal. The -s user flag makes it available across all Claude
Code sessions.
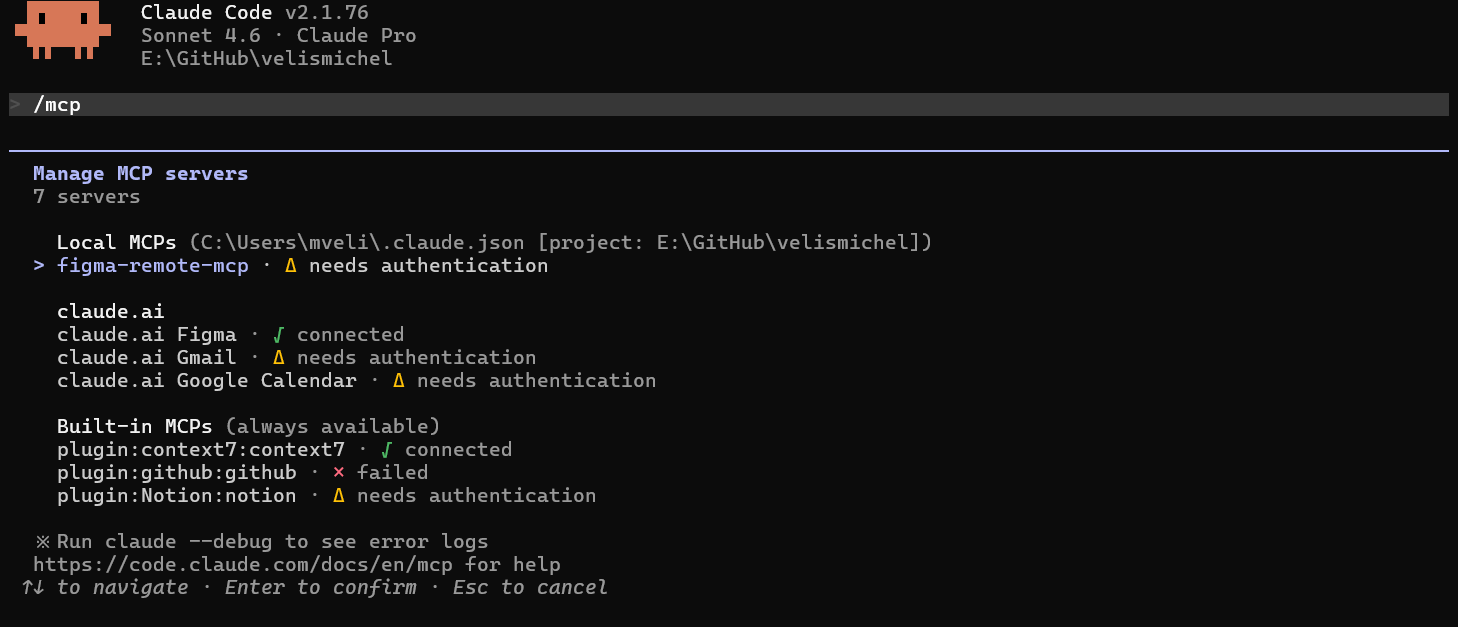
Both MCPs listed in /mcp. The tool count next to figma-console should be 58 if
ENABLE_MCP_APPS is set correctly.
Step 4 — Install the Desktop Bridge plugin in Figma
The Desktop Bridge is what gives Claude write access to your open Figma file. It's a plugin you install once and run whenever you want the connection active.
- Clone or download the figma-console-mcp repo
- Open Figma Desktop with your file
- Go to Plugins → Development → Import plugin from manifest
- Navigate to the
figma-desktop-bridgefolder and selectmanifest.json - The plugin now appears under Development plugins
Run it inside your file. It opens a small panel in the corner.
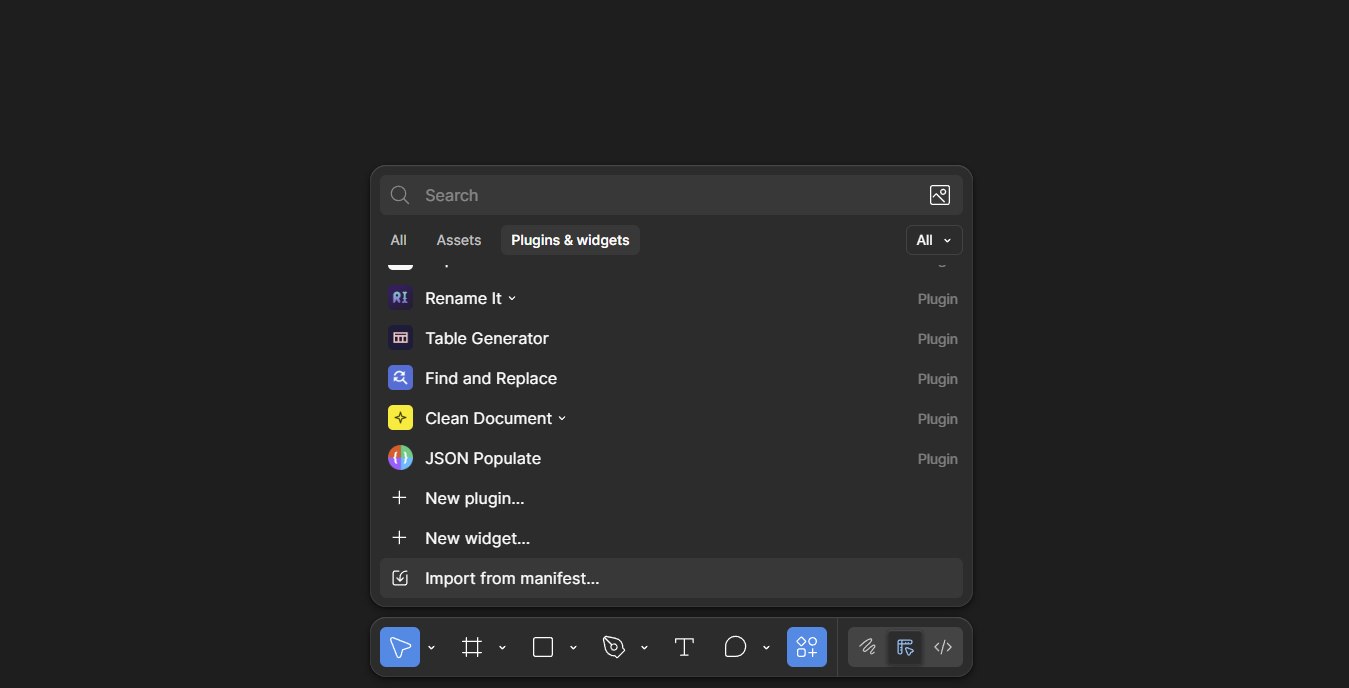
Importing the Desktop Bridge plugin from its manifest.json. Once installed it stays in your Development plugins list permanently.
Step 5 — Pair Claude Code with Figma
In Claude Code, type:
Check Figma statusClaude will respond with a 6-character pairing code and a 5-minute countdown. Enter that code in the Desktop Bridge plugin panel and click Connect.
You're now paired. Claude has read and write access to the open Figma file. The connection persists until you close the plugin or disconnect manually — and re-pairing just takes two clicks and a code entry.
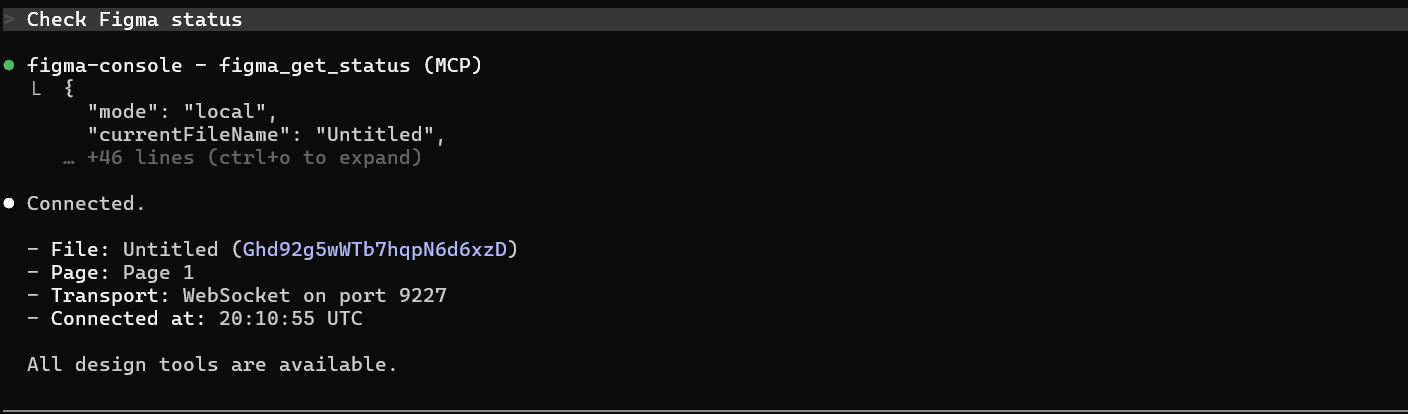
Claude Code returns a 6-character code. Enter it in the Desktop Bridge plugin panel inside Figma within 5 minutes.
Step 6 — Test write access
Send this to Claude Code:
Create a simple frame in Figma — 400px wide, 200px tall,
filled with a dark blue background (#1A1A2E),
centered on the canvas. Label it "MCP Test Frame".
Watch your Figma file. A frame should appear while Claude is still mid-sentence. If it does, the full stack is working.
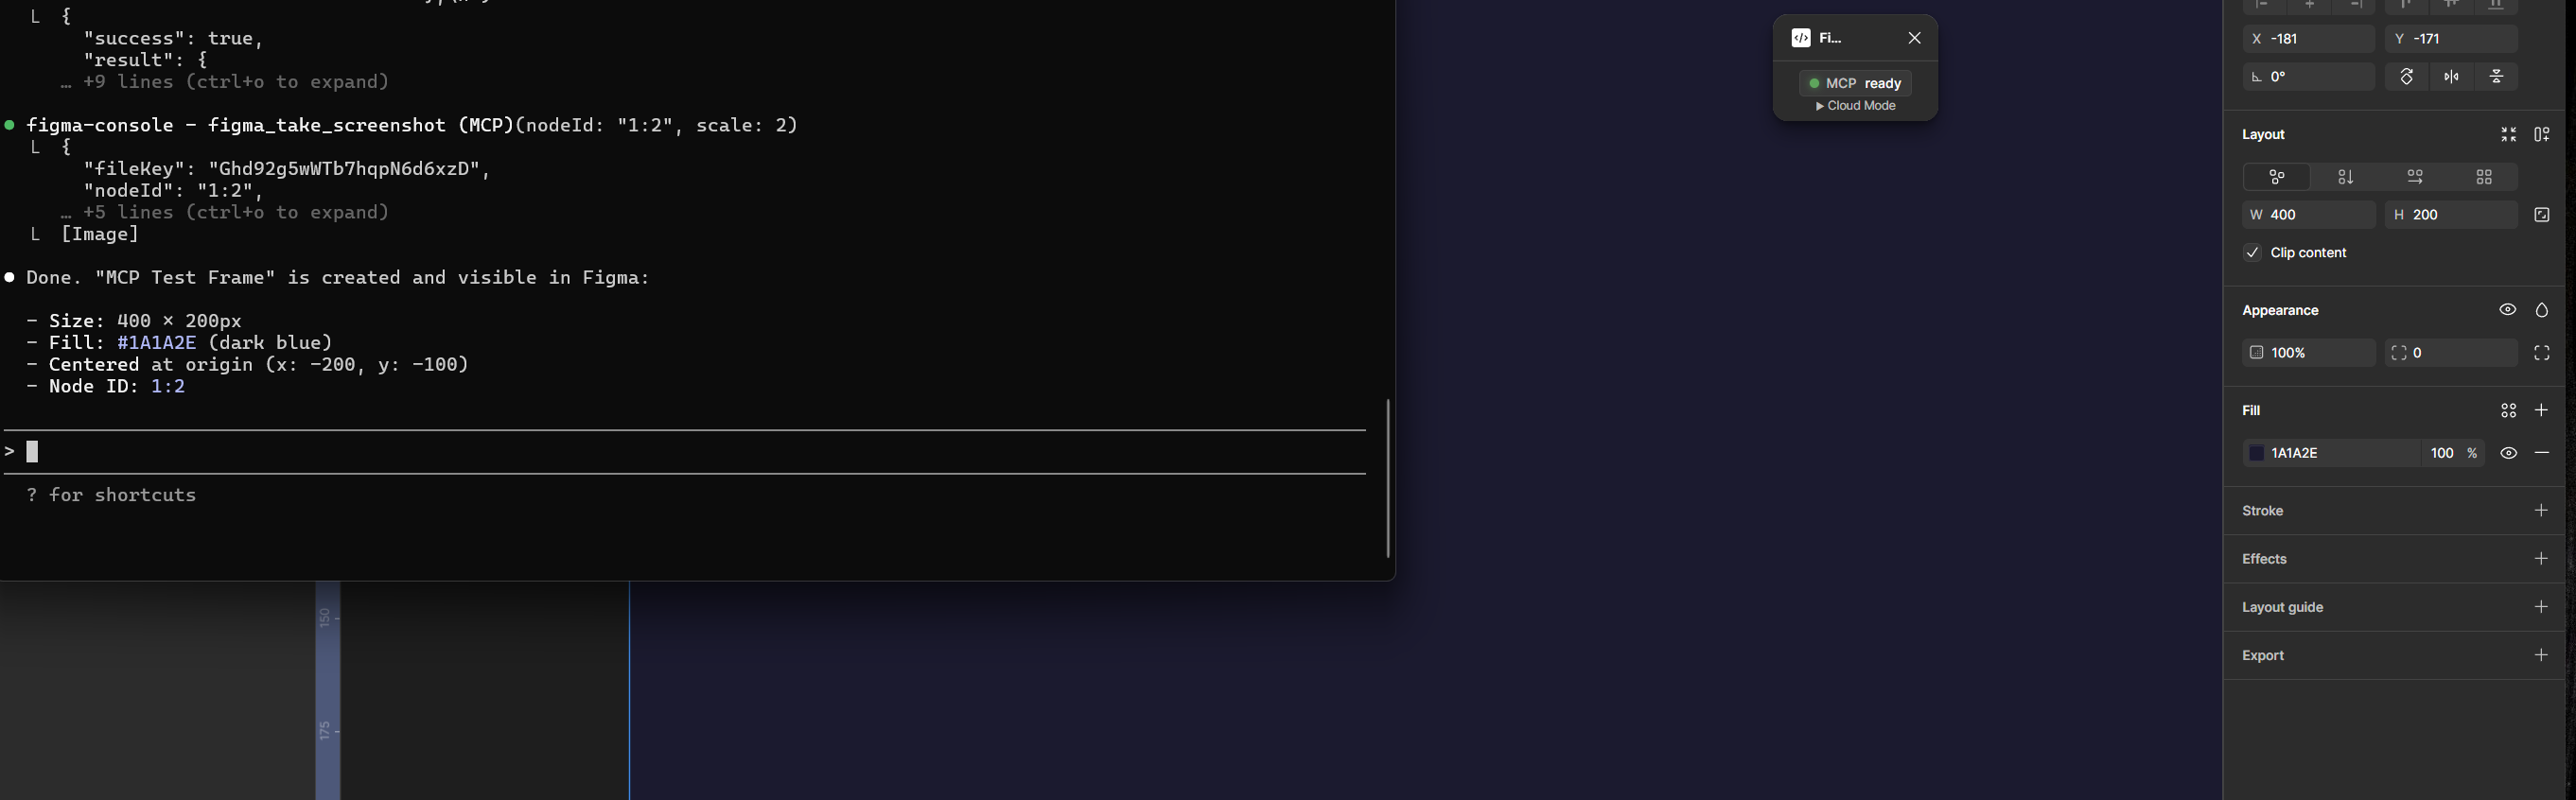
The test frame appearing in your Figma file as Claude executes. This is the moment the stack becomes real.
What you can actually do now
Here's where it stops being a setup guide.
Design tokens — no spreadsheet, no clicking
Managing a variable collection for Light and Dark modes takes about an hour by hand. With the stack running:
Create a new variable collection called "Brand Colors" with Light and Dark modes.
Add a primary color: #1A73E8 for Light, #5BA4F5 for Dark.
Add a background: #FFFFFF for Light, #0F0F0F for Dark.
Add a surface color: #F5F5F5 for Light, #1A1A1A for Dark.
Done. Every variable, every mode, every value — created in Figma while you described them. Then:
Rename the "Light" mode to "Light Theme" across all collections.That one used to be ten minutes of clicking.
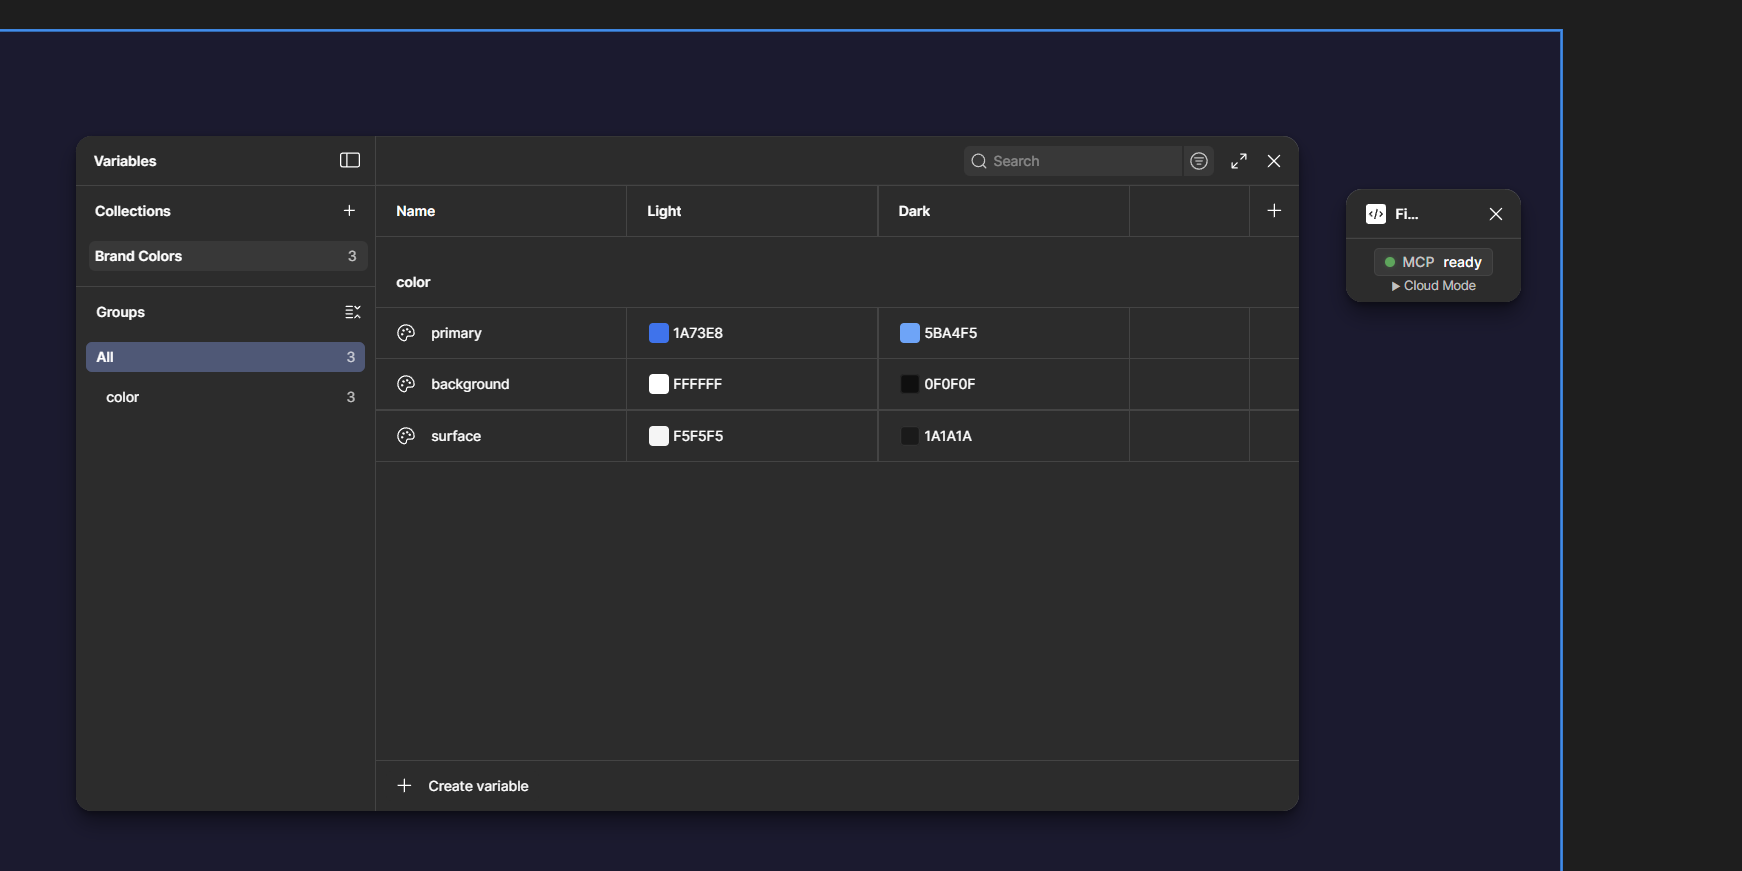
The Variables panel in Figma after Claude creates the collection. Both modes, all values — from a single prompt.
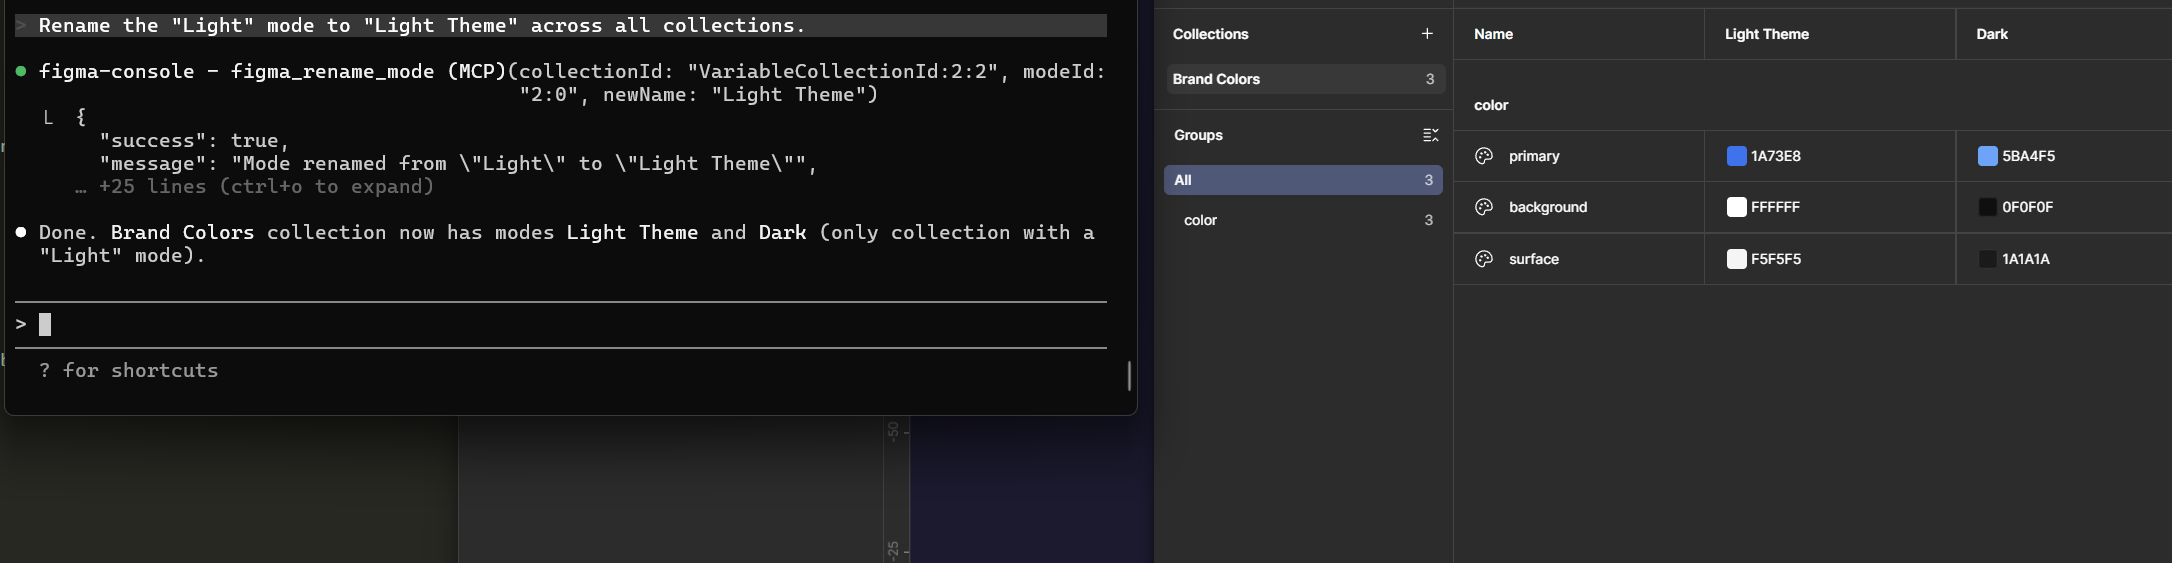
Mode renamed across all collections in one instruction. That used to be ten minutes of clicking.
Components — describe, iterate, done
Design a notification toast component. Left side: a status icon
(create success, warning, and error variants). Center: a title
in 14px semibold and a description in 13px regular. Right side:
a dismiss X button. 340px wide, 12px padding, 8px border radius.
Claude builds it, takes an internal screenshot, checks the result, and iterates if spacing is off. The build-screenshot-analyze-iterate loop is built into how the MCP works. You're not getting a description of what to build — you're getting the thing itself.
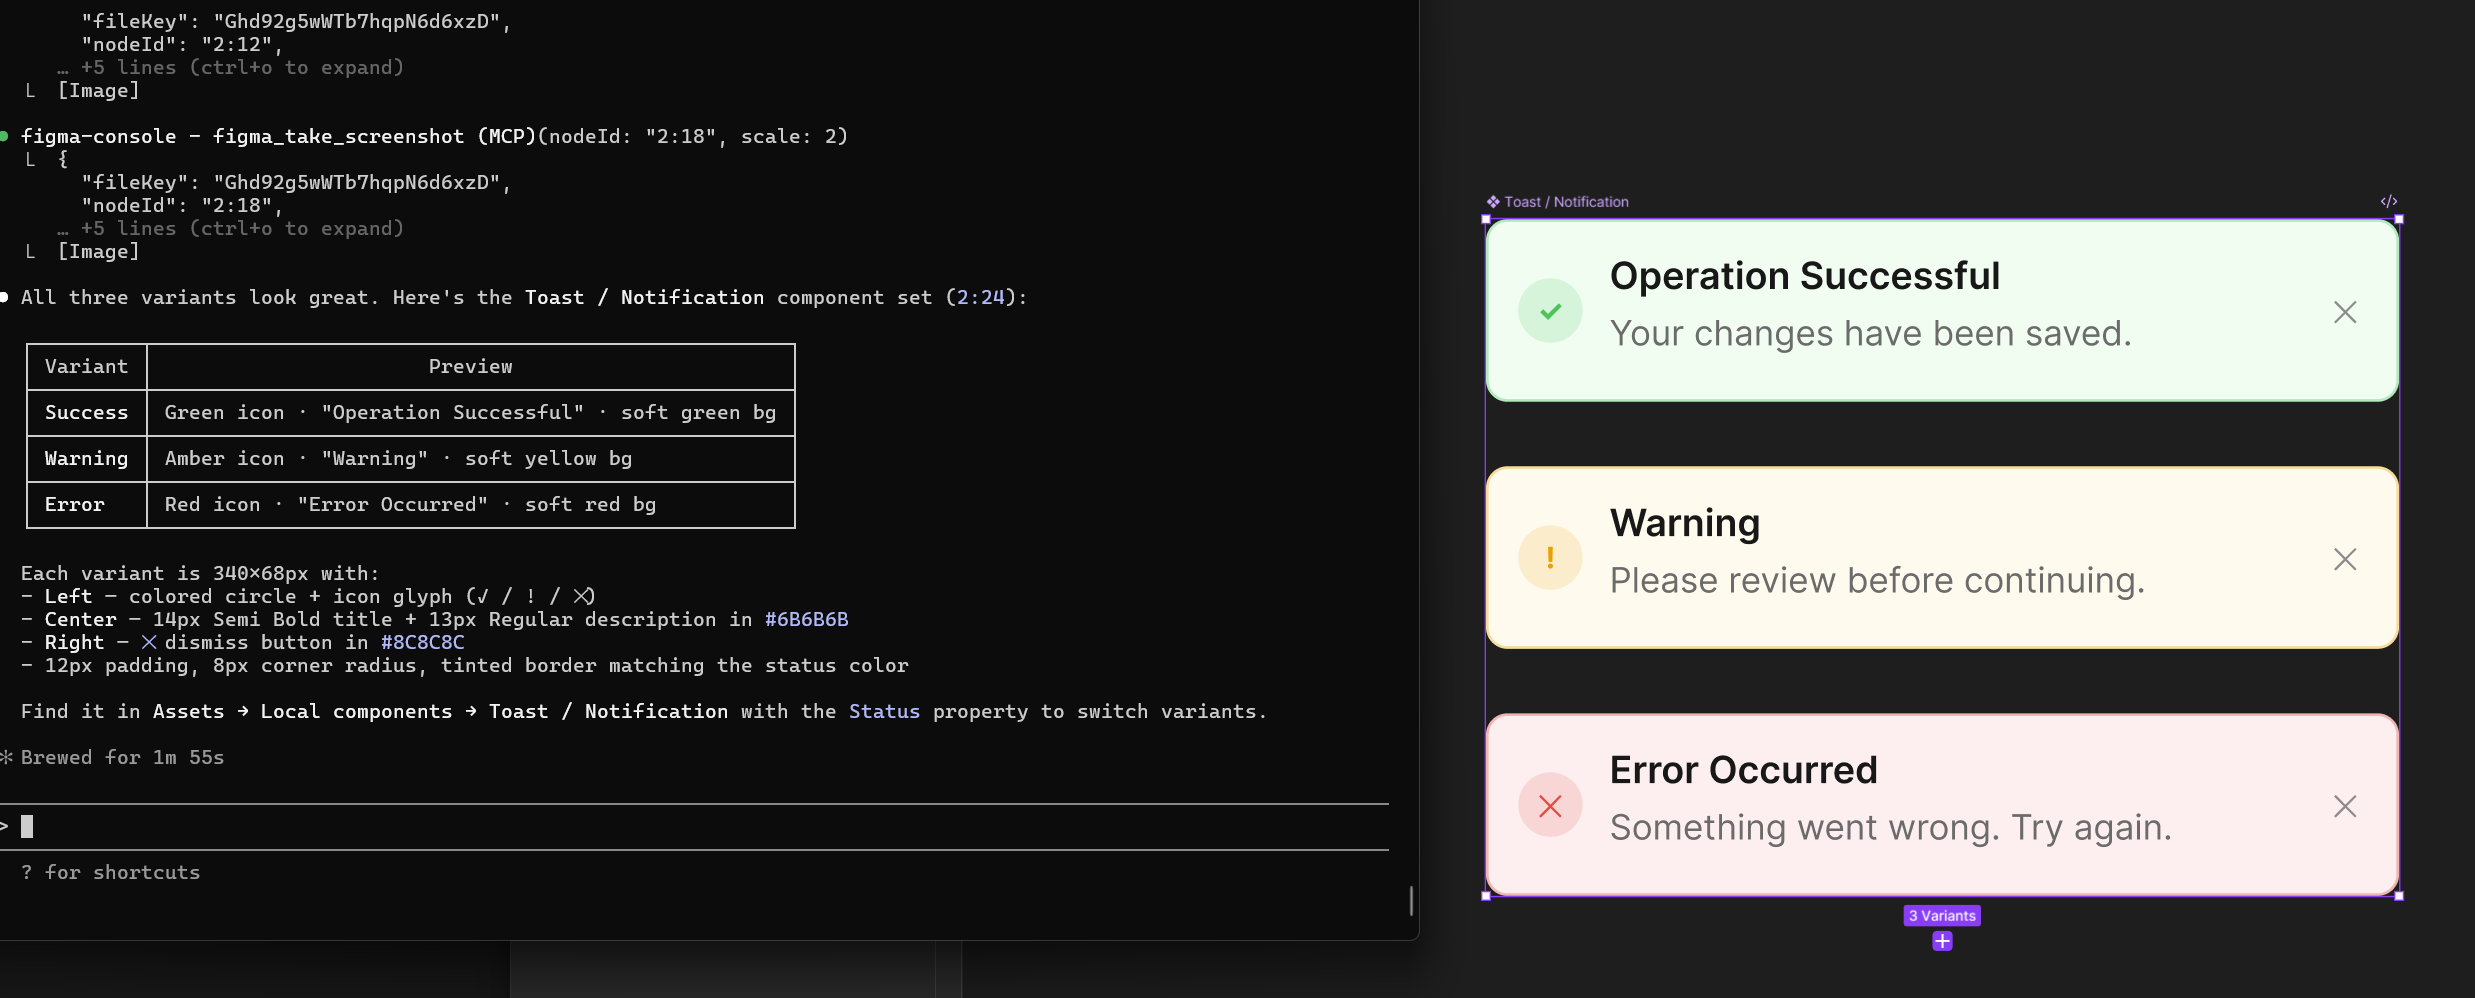
An alert component generated directly in Figma from a single prompt — variants, spacing, and all.
Component set organization
Got six button variants scattered in a frame? Claude can convert them into a proper Figma component set — purple dashed border, labeled rows and columns, correct spacing — in a single instruction. The tool is figma_arrange_component_set. You just tell it what the variants represent.
Design System Dashboard (the one that'll change how you audit)
With ENABLE_MCP_APPS=true set (which you did), this is available:
Audit my design systemClaude runs the Design System Dashboard — a scored health check across naming conventions, token coverage, component consistency, accessibility, and completeness. You get a weighted score per category and actionable findings. The results don't consume your context window because they render as an MCP App panel inside Claude Code, not as text output.
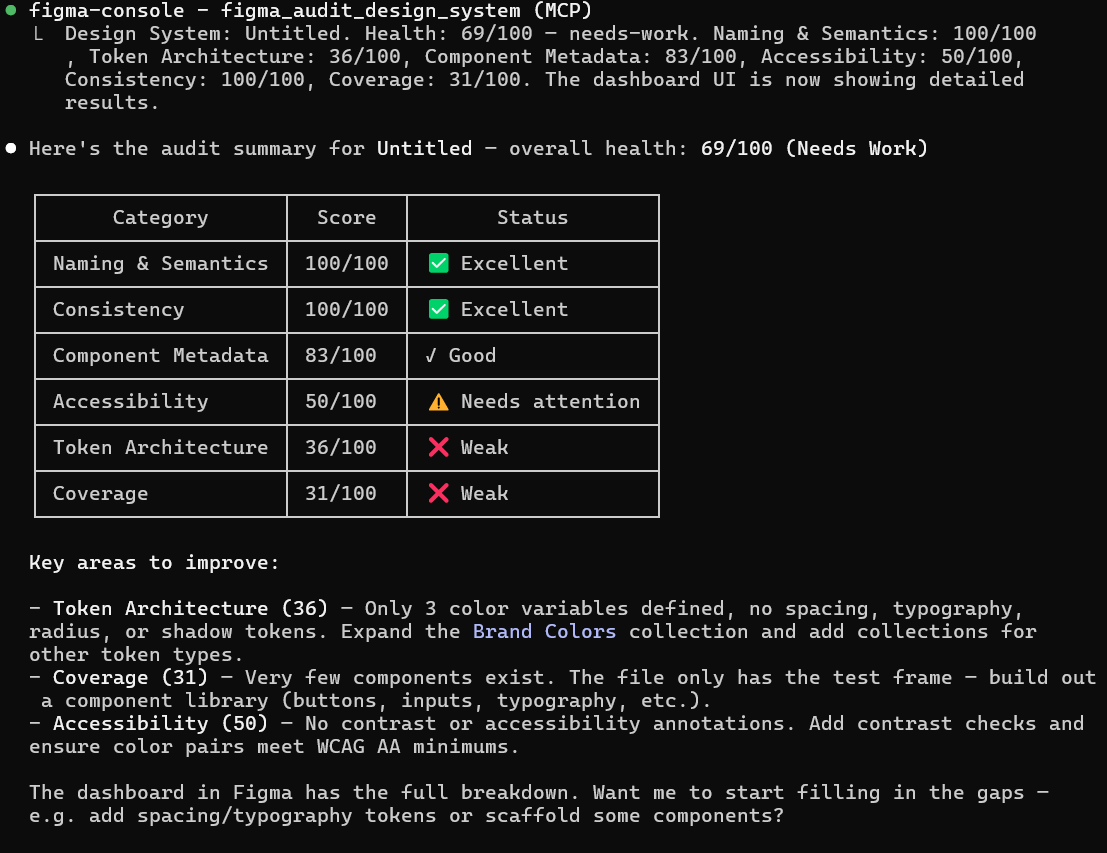
The Design System Dashboard renders as a panel inside Claude Code — scores by category, with specific findings beneath each. No scrolling through walls of text.
Code generation from your actual designs (official MCP)
This is where Figma's official MCP enters the workflow. In your Figma browser file (not Desktop), switch to Dev Mode, right-click a component or frame, and copy the selection link. Paste it into Claude Code:
Using this Figma frame as reference — [paste your link here] — generate a React
component that matches the design. Use the existing Button and Card components
from our @components/ui folder.
Claude reads the frame through mcp.figma.com, sees the actual layout and values, and generates code that references your real components — not invented ones. If you've set up Figma's Code Connect, the output already uses <Button variant="primary"> instead of a hardcoded <div>.
For designers who hand off to developers, this replaces the spec document.
Where things actually break
Pairing code expires in 5 minutes. If you step away and reconnect, you re-pair. Two clicks, one code, ten seconds. Annoying until it's automatic — which is about the third time you do it.
Cloud Mode (Remote SSE only) is read-only. If you connect via figma-console-mcp.southleft.com/sse without the Desktop Bridge pairing, nothing will appear in your Figma frames. This guide bypasses that entirely by using Local Mode.
MCP Apps require ENABLE_MCP_APPS=true. If you skipped that env flag in Step 3, re-run the install command with it set. The Design System Dashboard and Token Browser won't be available without it.
Real-time console monitoring requires the plugin to be running. If you close the Desktop Bridge and reopen it, you'll need to re-pair. Keep it open in the background during working sessions.
The mental model that makes it click
This isn't "AI does Figma for you." It's "describing design intent is now a productive act."
You've always known what a component should feel like before you built it. The problem was the translation layer — turning that intent into nested auto-layout frames, exact padding values, organized variable collections. That translation is where half the time went.
Figma Console MCP closes that gap. The official Figma MCP closes the gap on the other side — turning what you built into code that developers can actually use. Claude Code is the conversation layer tying both together.
You still decide what the component should feel like. You still decide what the brand colors mean. The AI executes. You direct. That's not a small distinction — it's the whole model.
Quick reference
| Task | What to use |
|---|---|
| Create frames, components, variants in Figma | Figma Console MCP — Local Mode + Desktop Bridge |
| Manage design tokens and variables | Figma Console MCP (all plans via Desktop Bridge) |
| Generate code from your Figma designs | Official Figma MCP (mcp.figma.com) |
| Audit your design system for consistency | Design System Dashboard (MCP App) with ENABLE_MCP_APPS=true |
| Browse tokens interactively | Token Browser MCP App (same flag) |
| Arrange component sets with proper labeling | figma_arrange_component_set tool via Figma Console MCP |
Where to go next
- Figma Console MCP: github.com/southleft/figma-console-mcp — full tool list, additional setup paths, changelog
- Desktop Bridge plugin:
figma-desktop-bridge/folder in the same repo — manifest, source, and release zips - Official Figma MCP guide: Figma Help Center — OAuth setup, Code Connect, team permissions
- Claude Code: claude.ai/code — download, subscription options,
/mcpcommand reference
The stack is real. The setup is Tuesday-afternoon doable. And once it's running, you'll wonder why you spent so long manually naming variable collections.